Posted By: trapped4ever
A whole lotter fun (putting up otters) tutorial - 02/12/11 06:31 AM
Well, here goes for the otter fleshing PM's. I picked up a couple little ones today, before the weather came up, and sent me home early. I did a demo of fleshing, for you all, with the 2 little guys this afternoon. This is how I put them up for the auction houses.
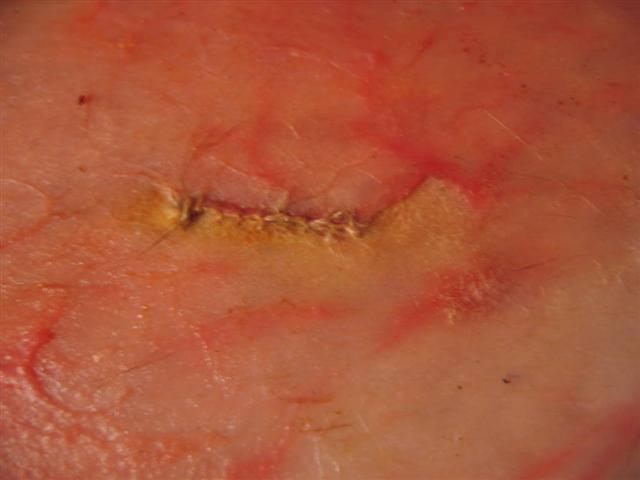
Before we get started, always comb dirt, dried blood, or really any sort of clumps, out of the fur, otherwise tears can happen when you hit these while fleshing. Be especially careful around conibear/ snare marks, bullet holes, nipples, and under arms. All are potential tears. If you do nick or tear, sew it up with dental floss.
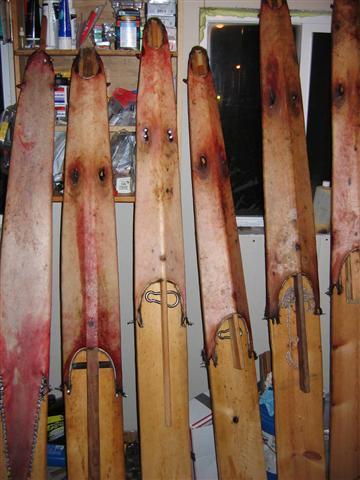
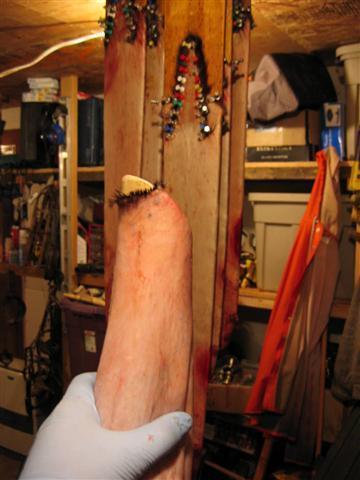
My fleshing pole is just 4" PVC that I beach combed. Price $0. I cut the top end at a 45 angle. I've been using this one for years. There are a few advantages and disadvantages to using PVC pipe, but we'll get to those later. Here's my set up.
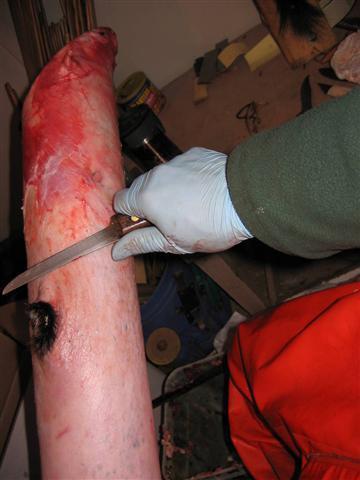
I use the beaver knife down to just below the front legs, all the way around. Like this....

If you have problems with the fat on the front legs, you can put them on a marten board or something for fleshing. I don't usually need to, but showed how, just to illustrate what I'm saying. Here's the front leg over my marten/ mink fleshing pole, which is 2" PVC, also beach combed. This helps stretch the skin taut for fleshing. I use my beaver knife on the front legs also.
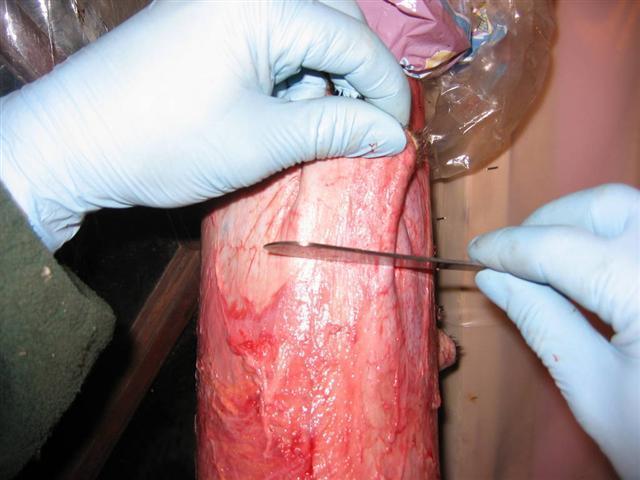
Next, I lightly score the membrane into 5 separate lengths. I split down the center of the back, where there is a natural separation. Then, on the belly side, where the fat and membrane meet, I kind of fillet back towards the membrane, with the knife held very flat to the hide. Next, I split each of the now two pieces of membrane in half. This makes two pieces of membrane on each side, and a row of fat down the belly, for a total of 5 separate strips to be fleshed. NOTE: when scoring the membrane be EXTREMELY careful not to score into the leather. Most adult otters have a layer of fat between membrane and hide, so it's easier with them. Juveniles are much thinner skinned, so great care is needed, and I sometimes all together omit this process with little ones. It does make adults much easier to flesh, as you don't ever have to reposition the hide. Just rotate the fleshing pole slightly, and start a new strip.
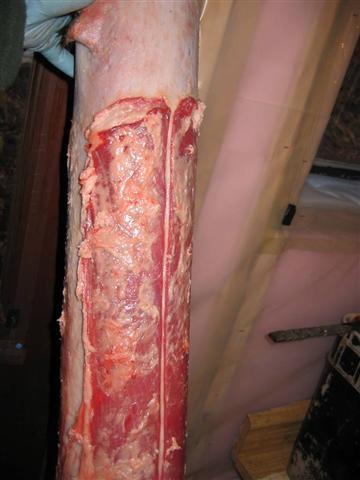
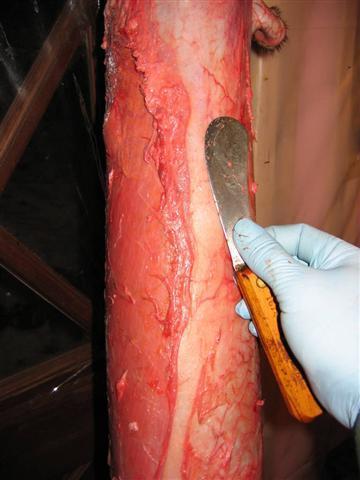
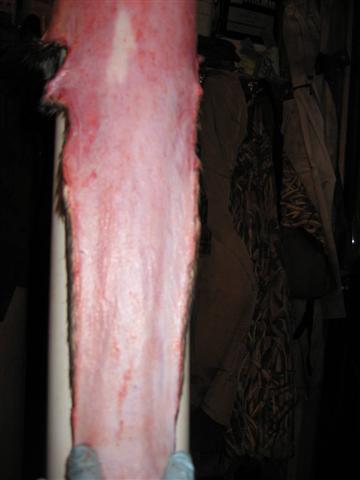
These strips are then individually fleshed down to the skirt area, taking care to keep fat, grease, meat, blood off the fur, or pole. I usually cut off the strips as I go. This takes maybe 5 minutes. Depends on the otter though. Some older ones have a lot of gristle. My fleshing knife is a piece of 1/4" X 3/4" X 22" bar stock I scrounged from an old homestead site 20 odd years ago. Price $0. It's all I ever use for a flesher on otter. I did add duct tape to the "handles" about 15 years ago, as they kinda dug into my hands otherwise. Here it is after the strips are fleshed.
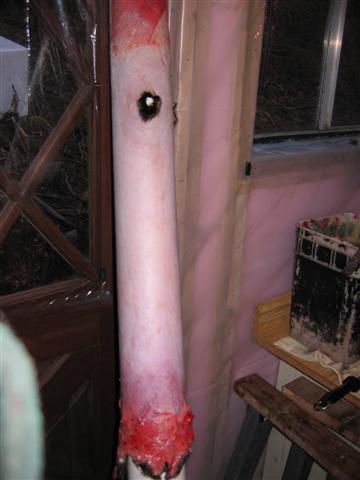
Next, I move the hide up the pole. Notice the front leg is now on the pole tip. One advantage to using the pipe here, is that the head is dropped back down the center of the pipe, keeping blood smears off your nice clean white leather. I usually have a lot of live foot trapped otter, that I dispatch with a .22. So some blood in the head area is common for me.
Moving the hide up the pole like this, gets the skirt/ tail up to the right height for working on. NOTE: When working on the skirt area, you don't need to worry too much about the last little bit of fat on the belly side, between the legs, as this area will be trimmed for an inspection window.
Then, I trim the last couple inches of fat from the skirt and back legs, using the beaver knife again. Be very careful around the nipples, as they tear easily. When done, it should look like this.
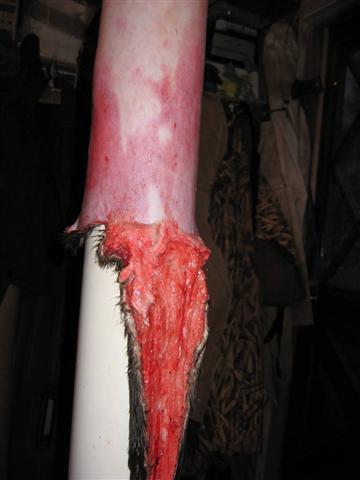
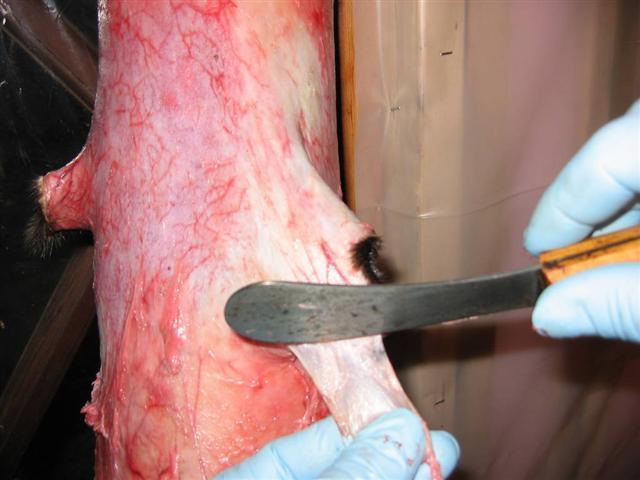
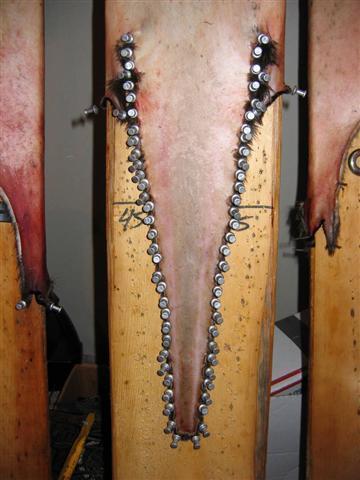
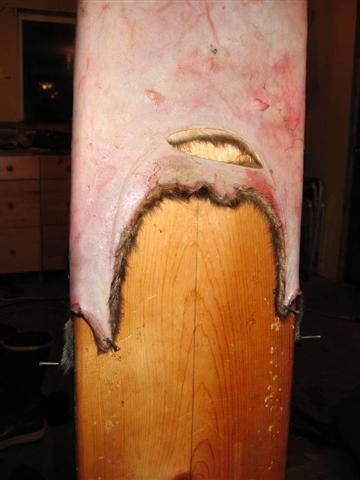
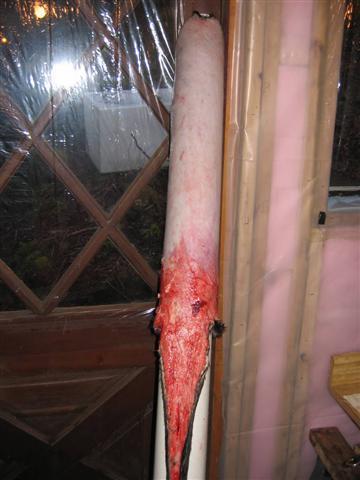
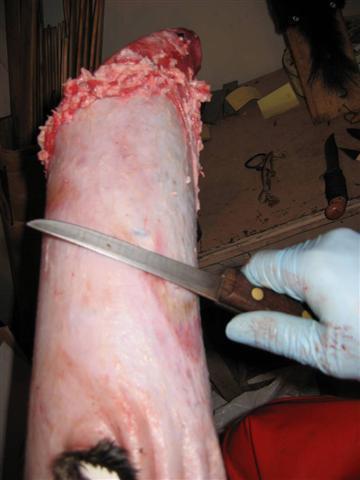
OK, now comes the fun part. I get the most questions about the tail. I just fillet it off with the beaver knife, starting from the top inside, of the "veins" of fat that run the length of the tail. Working from the center towards the outside edge. A super sharp knife helps a lot here. This is how I start...
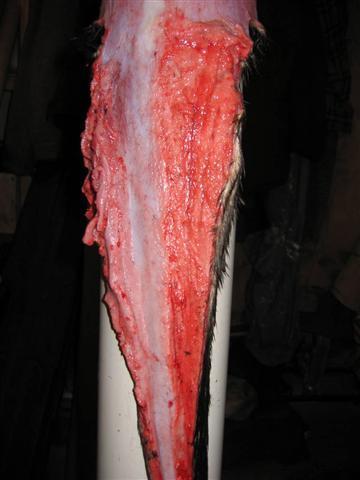
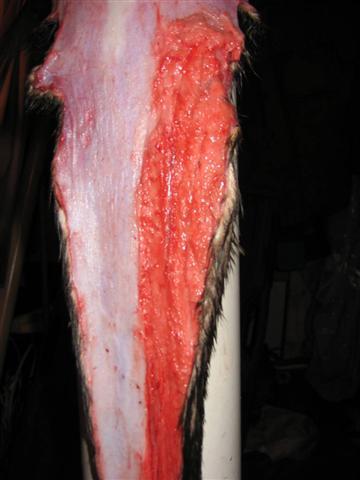
Then, just carefully work your way out to the edge.
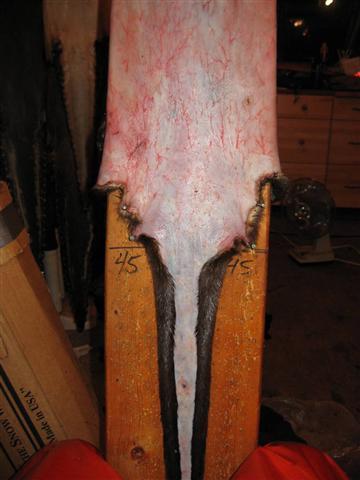
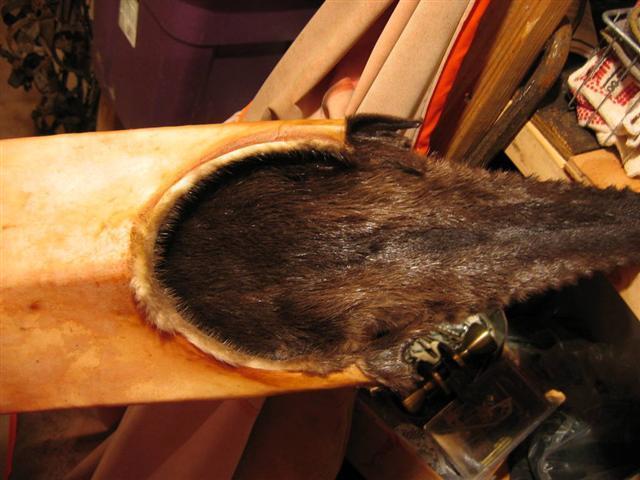
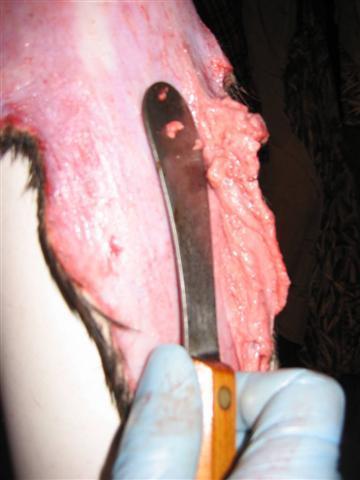
Here is where a wooden pole works a little better, as you can temporarily tack the tail open, to make fleshing easier. I hold my knife very flat to the hide, and pretty vertical to the tail, while doing this "filleting", like this....
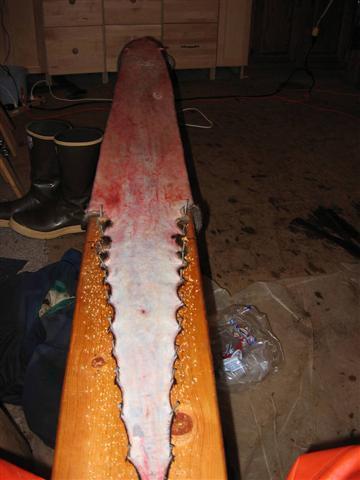
Here's the finished tail.
Last area to do now is the head/ neck. For this, I lay the pole across my knees, and keep the neck area tight by pulling down on the front leg holes. I flesh back towards the head, using a longer, more flexible bladed type knife.
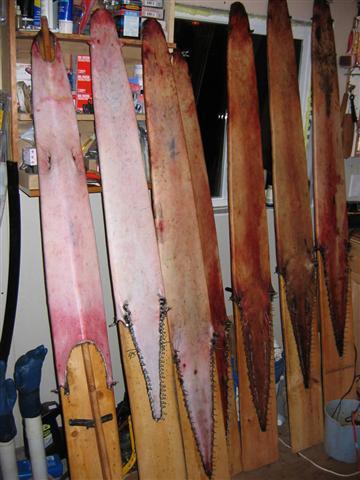
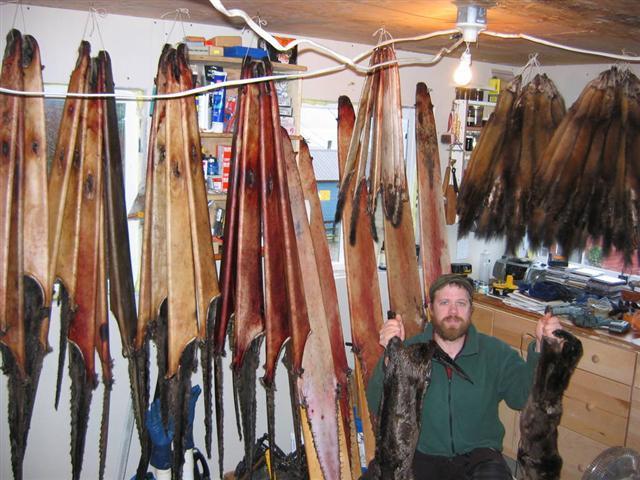
Finished products. NOTE: Inspection window cut out on belly side, lower lip removed for auction tag, and I try to remember to tack an eye hole open for CITIES tagger.
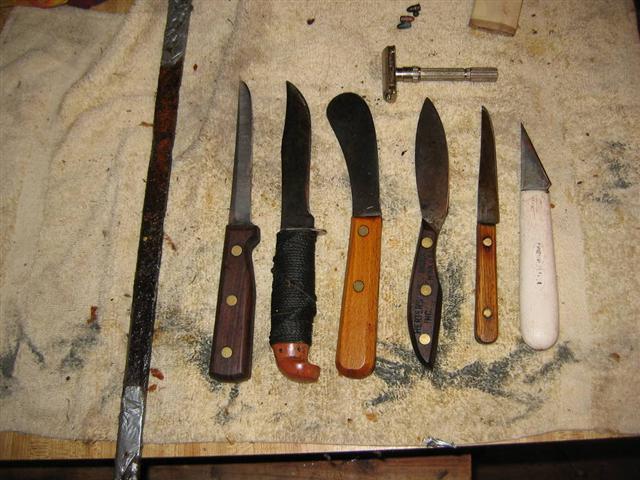
The tools I use for both skinning and fleshing otters. The safety razor rarely gets used. Only on older, more gristle laden necks. The older otter seem to have a lot more of this. Little ones tend to be much thinner skinned, so be especially careful on them.
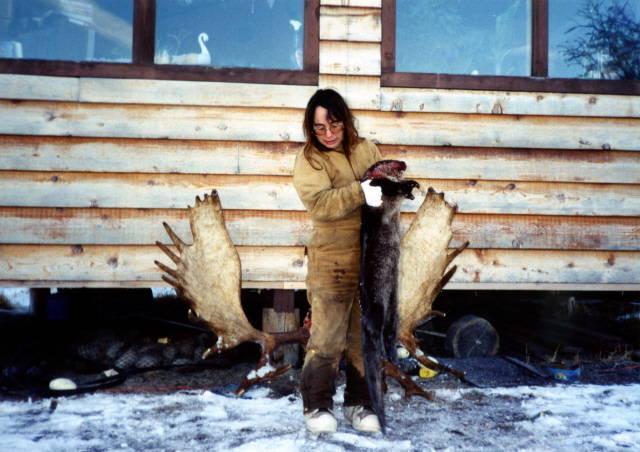
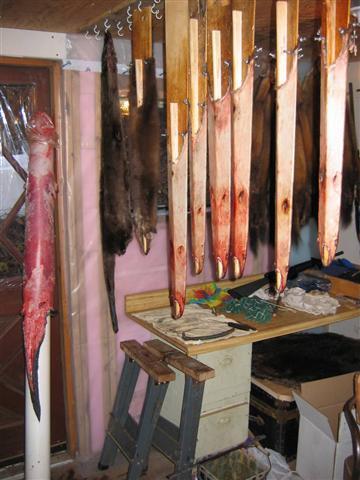
Todays catch before processing.
I'm sure I left a few things out. I hope this helps some of you. Questions, comments or input, feel free.
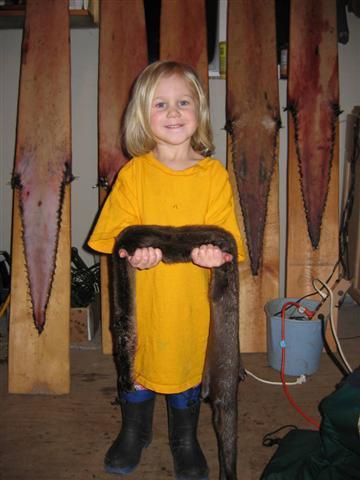
My favorite picture of the day. One of daddy's little helpers.
Before we get started, always comb dirt, dried blood, or really any sort of clumps, out of the fur, otherwise tears can happen when you hit these while fleshing. Be especially careful around conibear/ snare marks, bullet holes, nipples, and under arms. All are potential tears. If you do nick or tear, sew it up with dental floss.
My fleshing pole is just 4" PVC that I beach combed. Price $0. I cut the top end at a 45 angle. I've been using this one for years. There are a few advantages and disadvantages to using PVC pipe, but we'll get to those later. Here's my set up.
I use the beaver knife down to just below the front legs, all the way around. Like this....
If you have problems with the fat on the front legs, you can put them on a marten board or something for fleshing. I don't usually need to, but showed how, just to illustrate what I'm saying. Here's the front leg over my marten/ mink fleshing pole, which is 2" PVC, also beach combed. This helps stretch the skin taut for fleshing. I use my beaver knife on the front legs also.
Next, I lightly score the membrane into 5 separate lengths. I split down the center of the back, where there is a natural separation. Then, on the belly side, where the fat and membrane meet, I kind of fillet back towards the membrane, with the knife held very flat to the hide. Next, I split each of the now two pieces of membrane in half. This makes two pieces of membrane on each side, and a row of fat down the belly, for a total of 5 separate strips to be fleshed. NOTE: when scoring the membrane be EXTREMELY careful not to score into the leather. Most adult otters have a layer of fat between membrane and hide, so it's easier with them. Juveniles are much thinner skinned, so great care is needed, and I sometimes all together omit this process with little ones. It does make adults much easier to flesh, as you don't ever have to reposition the hide. Just rotate the fleshing pole slightly, and start a new strip.
These strips are then individually fleshed down to the skirt area, taking care to keep fat, grease, meat, blood off the fur, or pole. I usually cut off the strips as I go. This takes maybe 5 minutes. Depends on the otter though. Some older ones have a lot of gristle. My fleshing knife is a piece of 1/4" X 3/4" X 22" bar stock I scrounged from an old homestead site 20 odd years ago. Price $0. It's all I ever use for a flesher on otter. I did add duct tape to the "handles" about 15 years ago, as they kinda dug into my hands otherwise. Here it is after the strips are fleshed.
Next, I move the hide up the pole. Notice the front leg is now on the pole tip. One advantage to using the pipe here, is that the head is dropped back down the center of the pipe, keeping blood smears off your nice clean white leather. I usually have a lot of live foot trapped otter, that I dispatch with a .22. So some blood in the head area is common for me.
Moving the hide up the pole like this, gets the skirt/ tail up to the right height for working on. NOTE: When working on the skirt area, you don't need to worry too much about the last little bit of fat on the belly side, between the legs, as this area will be trimmed for an inspection window.
Then, I trim the last couple inches of fat from the skirt and back legs, using the beaver knife again. Be very careful around the nipples, as they tear easily. When done, it should look like this.
OK, now comes the fun part. I get the most questions about the tail. I just fillet it off with the beaver knife, starting from the top inside, of the "veins" of fat that run the length of the tail. Working from the center towards the outside edge. A super sharp knife helps a lot here. This is how I start...
Then, just carefully work your way out to the edge.
Here is where a wooden pole works a little better, as you can temporarily tack the tail open, to make fleshing easier. I hold my knife very flat to the hide, and pretty vertical to the tail, while doing this "filleting", like this....
Here's the finished tail.
Last area to do now is the head/ neck. For this, I lay the pole across my knees, and keep the neck area tight by pulling down on the front leg holes. I flesh back towards the head, using a longer, more flexible bladed type knife.
Finished products. NOTE: Inspection window cut out on belly side, lower lip removed for auction tag, and I try to remember to tack an eye hole open for CITIES tagger.
The tools I use for both skinning and fleshing otters. The safety razor rarely gets used. Only on older, more gristle laden necks. The older otter seem to have a lot more of this. Little ones tend to be much thinner skinned, so be especially careful on them.
Todays catch before processing.
I'm sure I left a few things out. I hope this helps some of you. Questions, comments or input, feel free.
My favorite picture of the day. One of daddy's little helpers.